Studio One and Dolby Atmos
Edit: This post was written in June, 2021, before Presonus added any Dolby Atmos support to Studio One. If you want to use Dolby Atmos, just upgrade to the latest version through Presonus website and it’ll save you a ton of hassle.
The Original Blog Post
I’ve been playing around with Studio One and the Dolby Atmos Renderer to try to create a binaural mix of a song I’m working on.
Studio One Limitations
Presonus still haven’t provided its users with multi channel support and you can therefor only create inputs, outputs and tracks with a maximum of 2 channels; left and right. Nothing else. This is a shame and I seriously hope Presonus are working on an upgrade that will support surround mixing. I know that they have to re-write all of their plugins and so on, but since more and more service will be providing multi channel support it would be nice for a content creator like myself to actually be able to both create and mix the music inside Studio One.
Prerequisists
You will need to download the Dolby Atmos Renderer (click here) and the Dolby Atmos Music Panner (click here if you’re on a Mac). The latter works great if you’re planning to use Objects when mixing. Objects are used to place a sound in the 3D space without having to think about how to mix it with the faders — the Renderer will take care of that. You can also step-sequence the movement of the Music Panner so a sound will move around in the 3D space.
Dolby Atmos Setup
Do I have a multi million dollar setup when it comes to high count output audio interfaces, speakers and room treatment? Nope. Sadly not. But I can still produce and mix music in this format.
I’ll take you through how I’ve setup my Studio One session to handle multiple channel outputs.
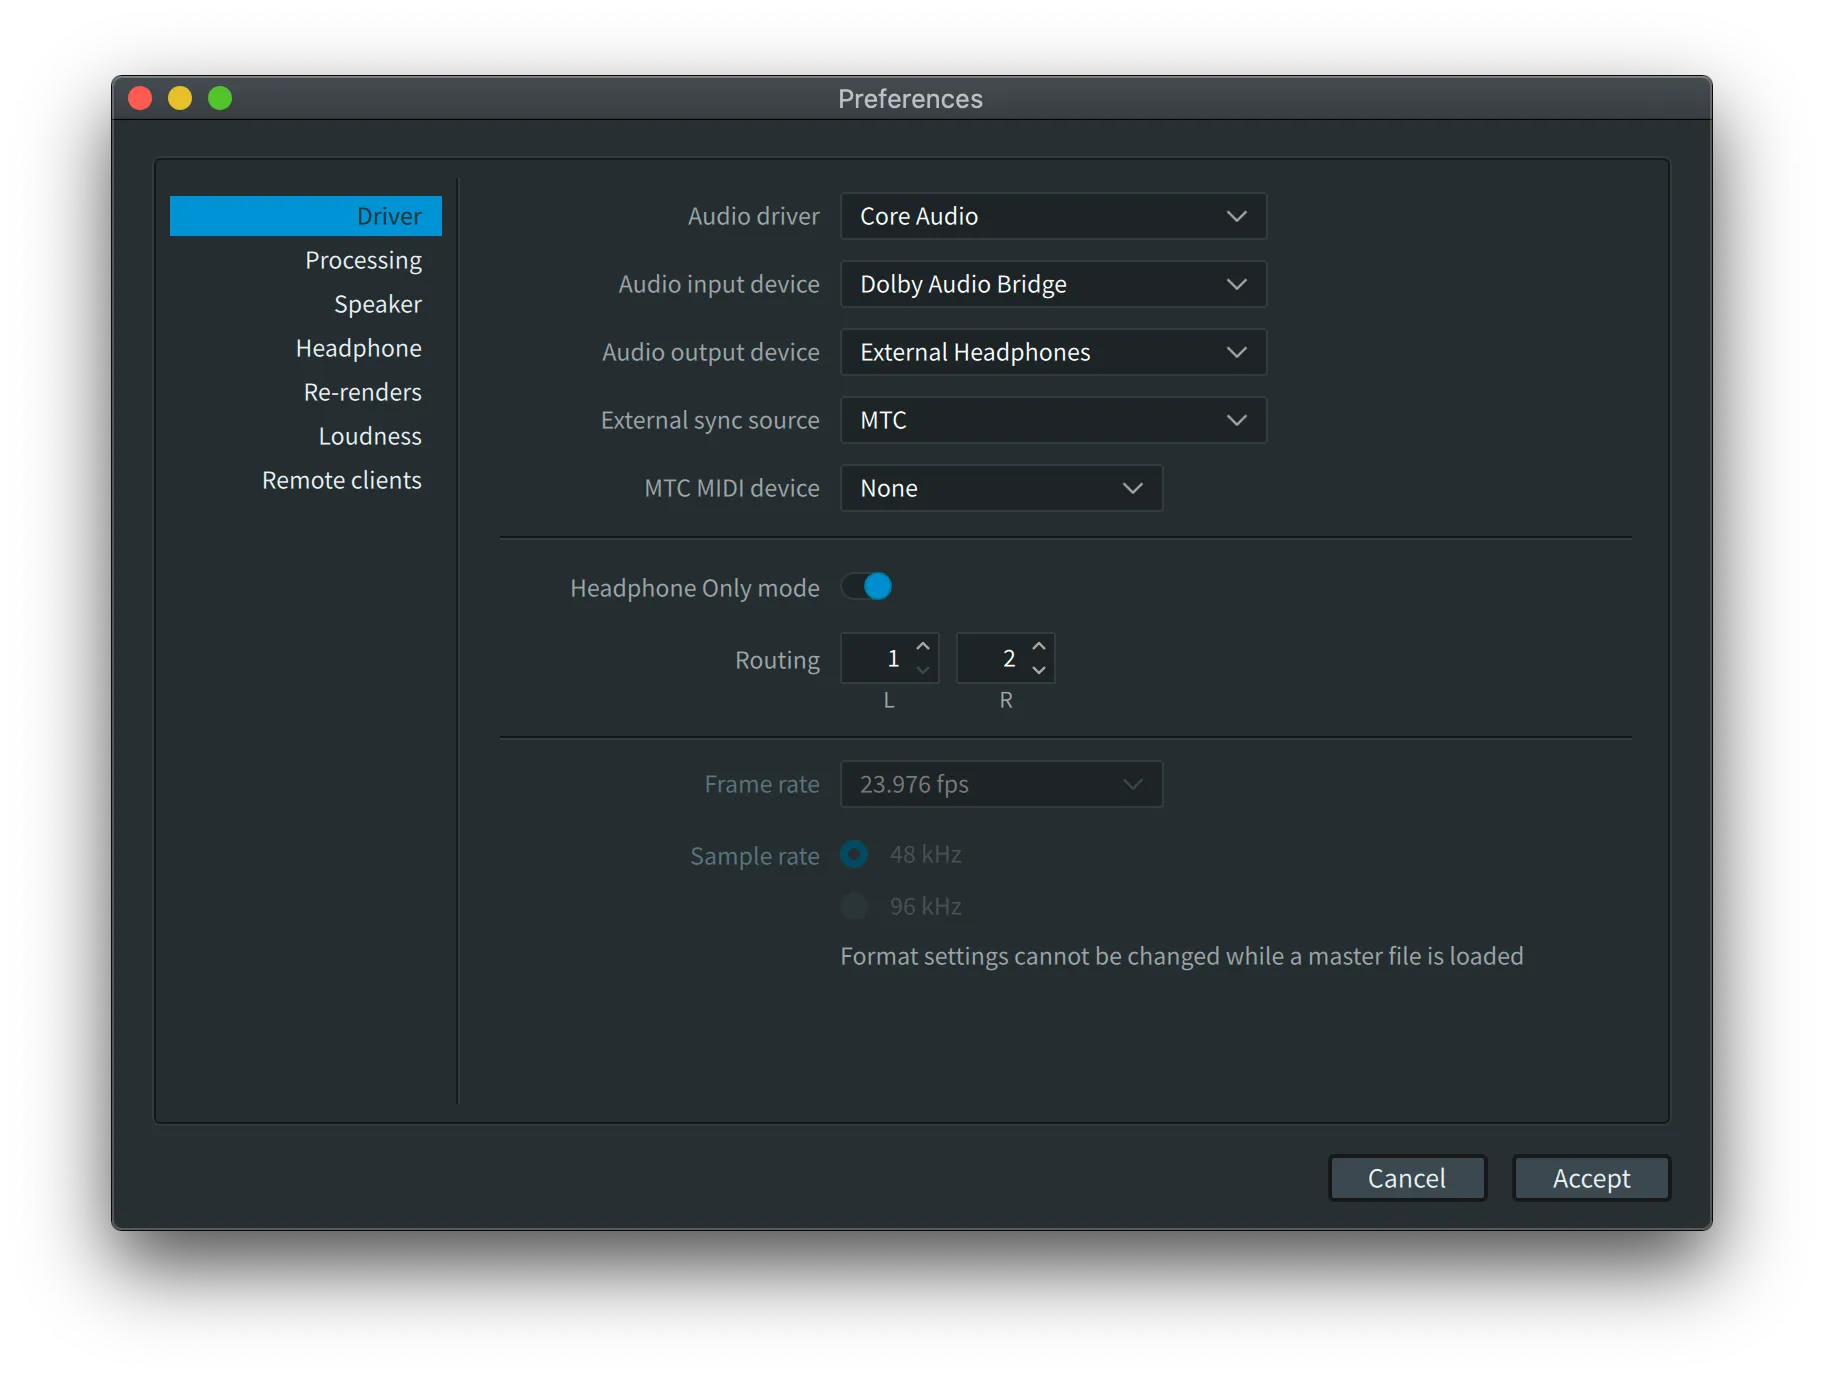
First up, here’s the Preference window of the Dolby Atmos Renderer. Since I’m on a Mac I chose Core Audio as my Audio driver. The Audio input device is the Dolby Audio Bridge, which gets installed together with the Renderer. My audio output device is my external headphones, a pair of Bose QC35ii before you ask. The External sync source can be set to MTC and leave MTC MIDI device set to None.

Then you might have to flip the switch to enable Headphones Only mode. This is super important (!) as you’d otherwise only hear the front left and right speakers and nothing else. Well, it depends on your setup but initially that’d be the case.
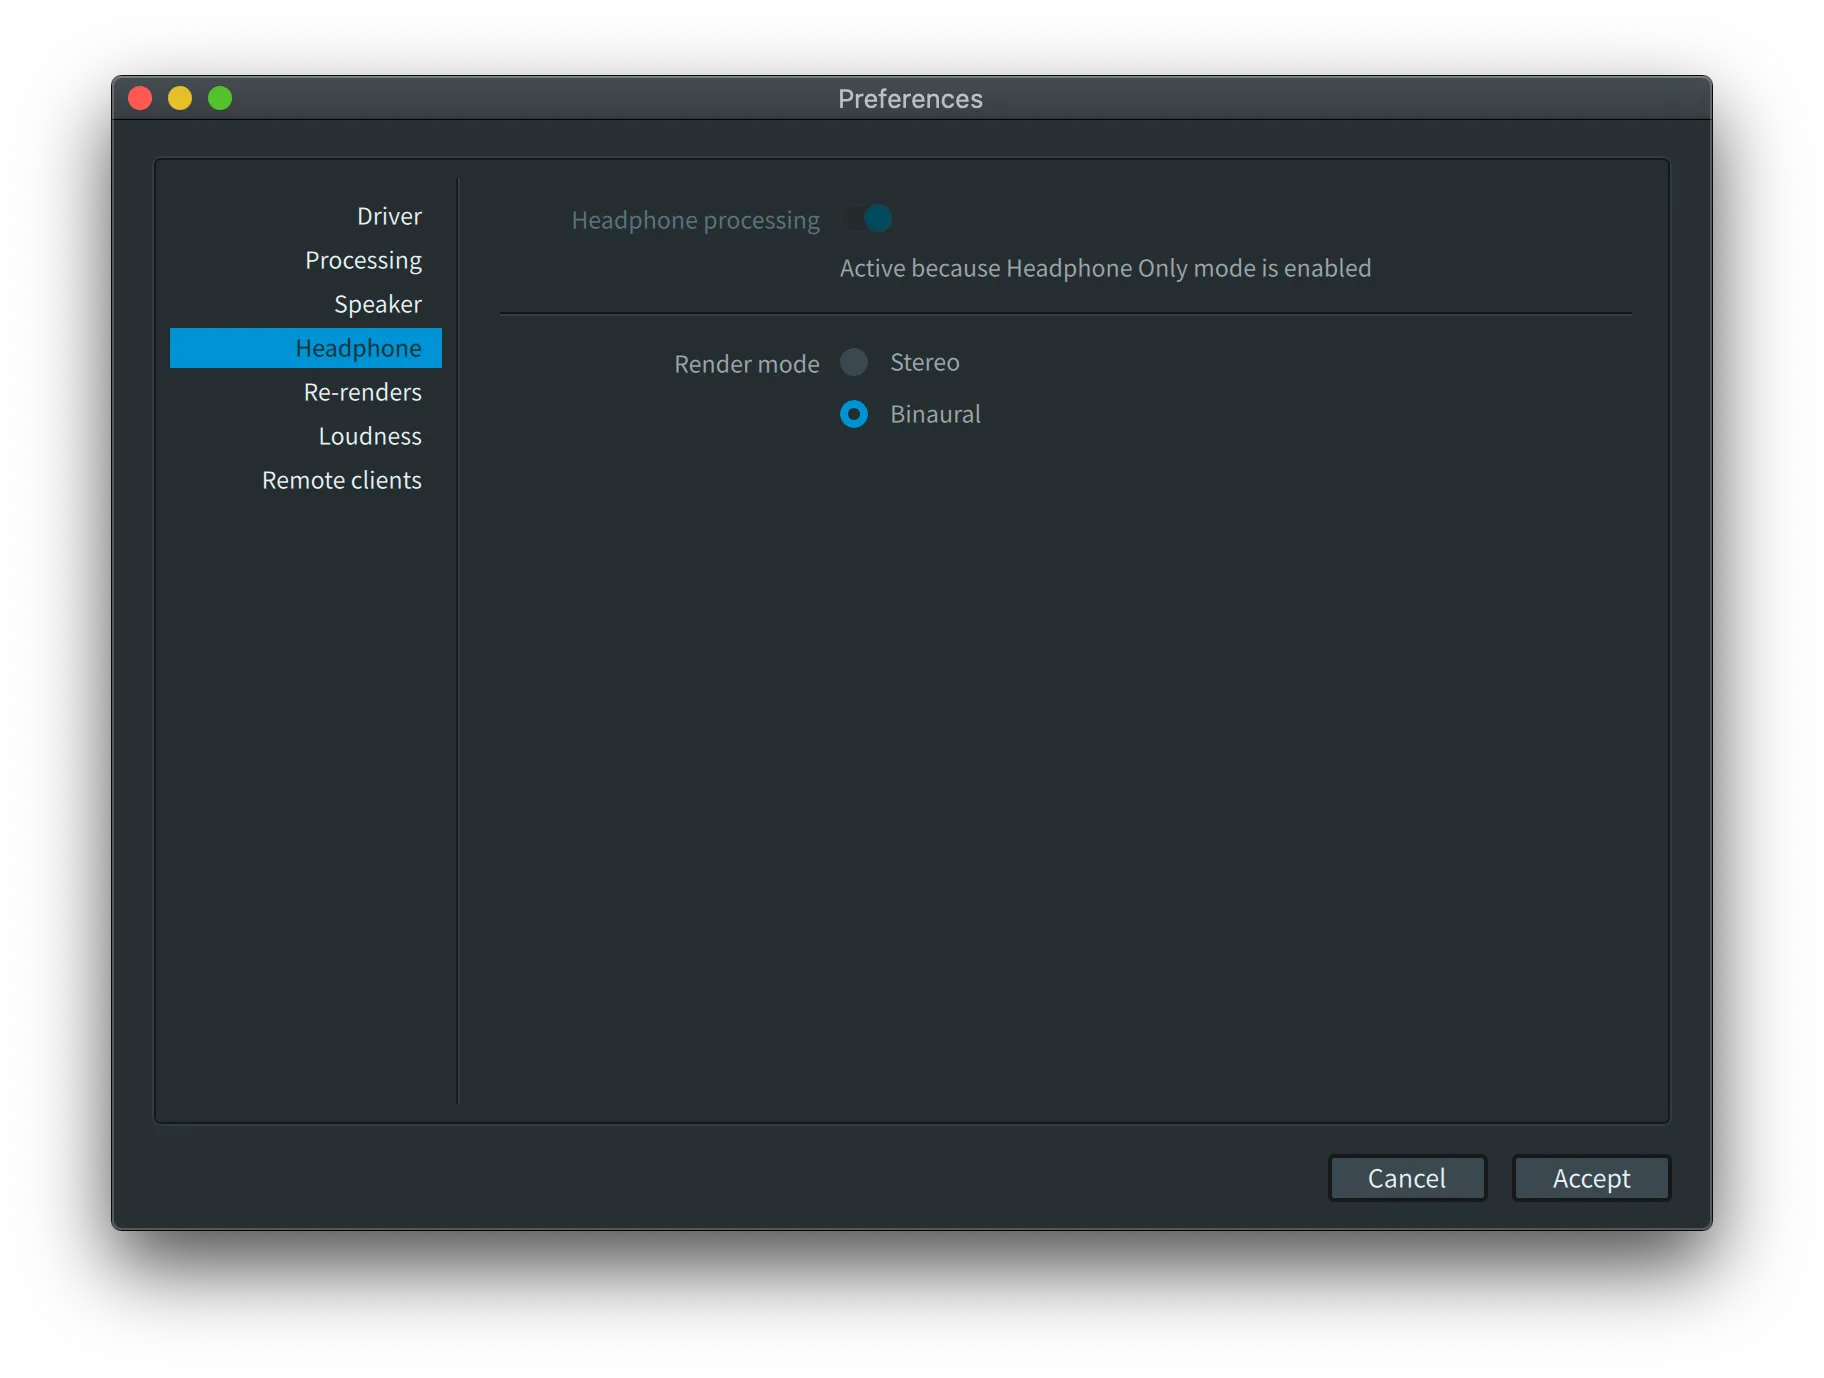
Click the Headphones tab to the left and make sure Binaural is the selected Render mode.
Click Accept and then press ⌘M (Control-M in Windows) to open the Room setup window. Here you’ll find the reference to which output from Studio One will go to which speaker.
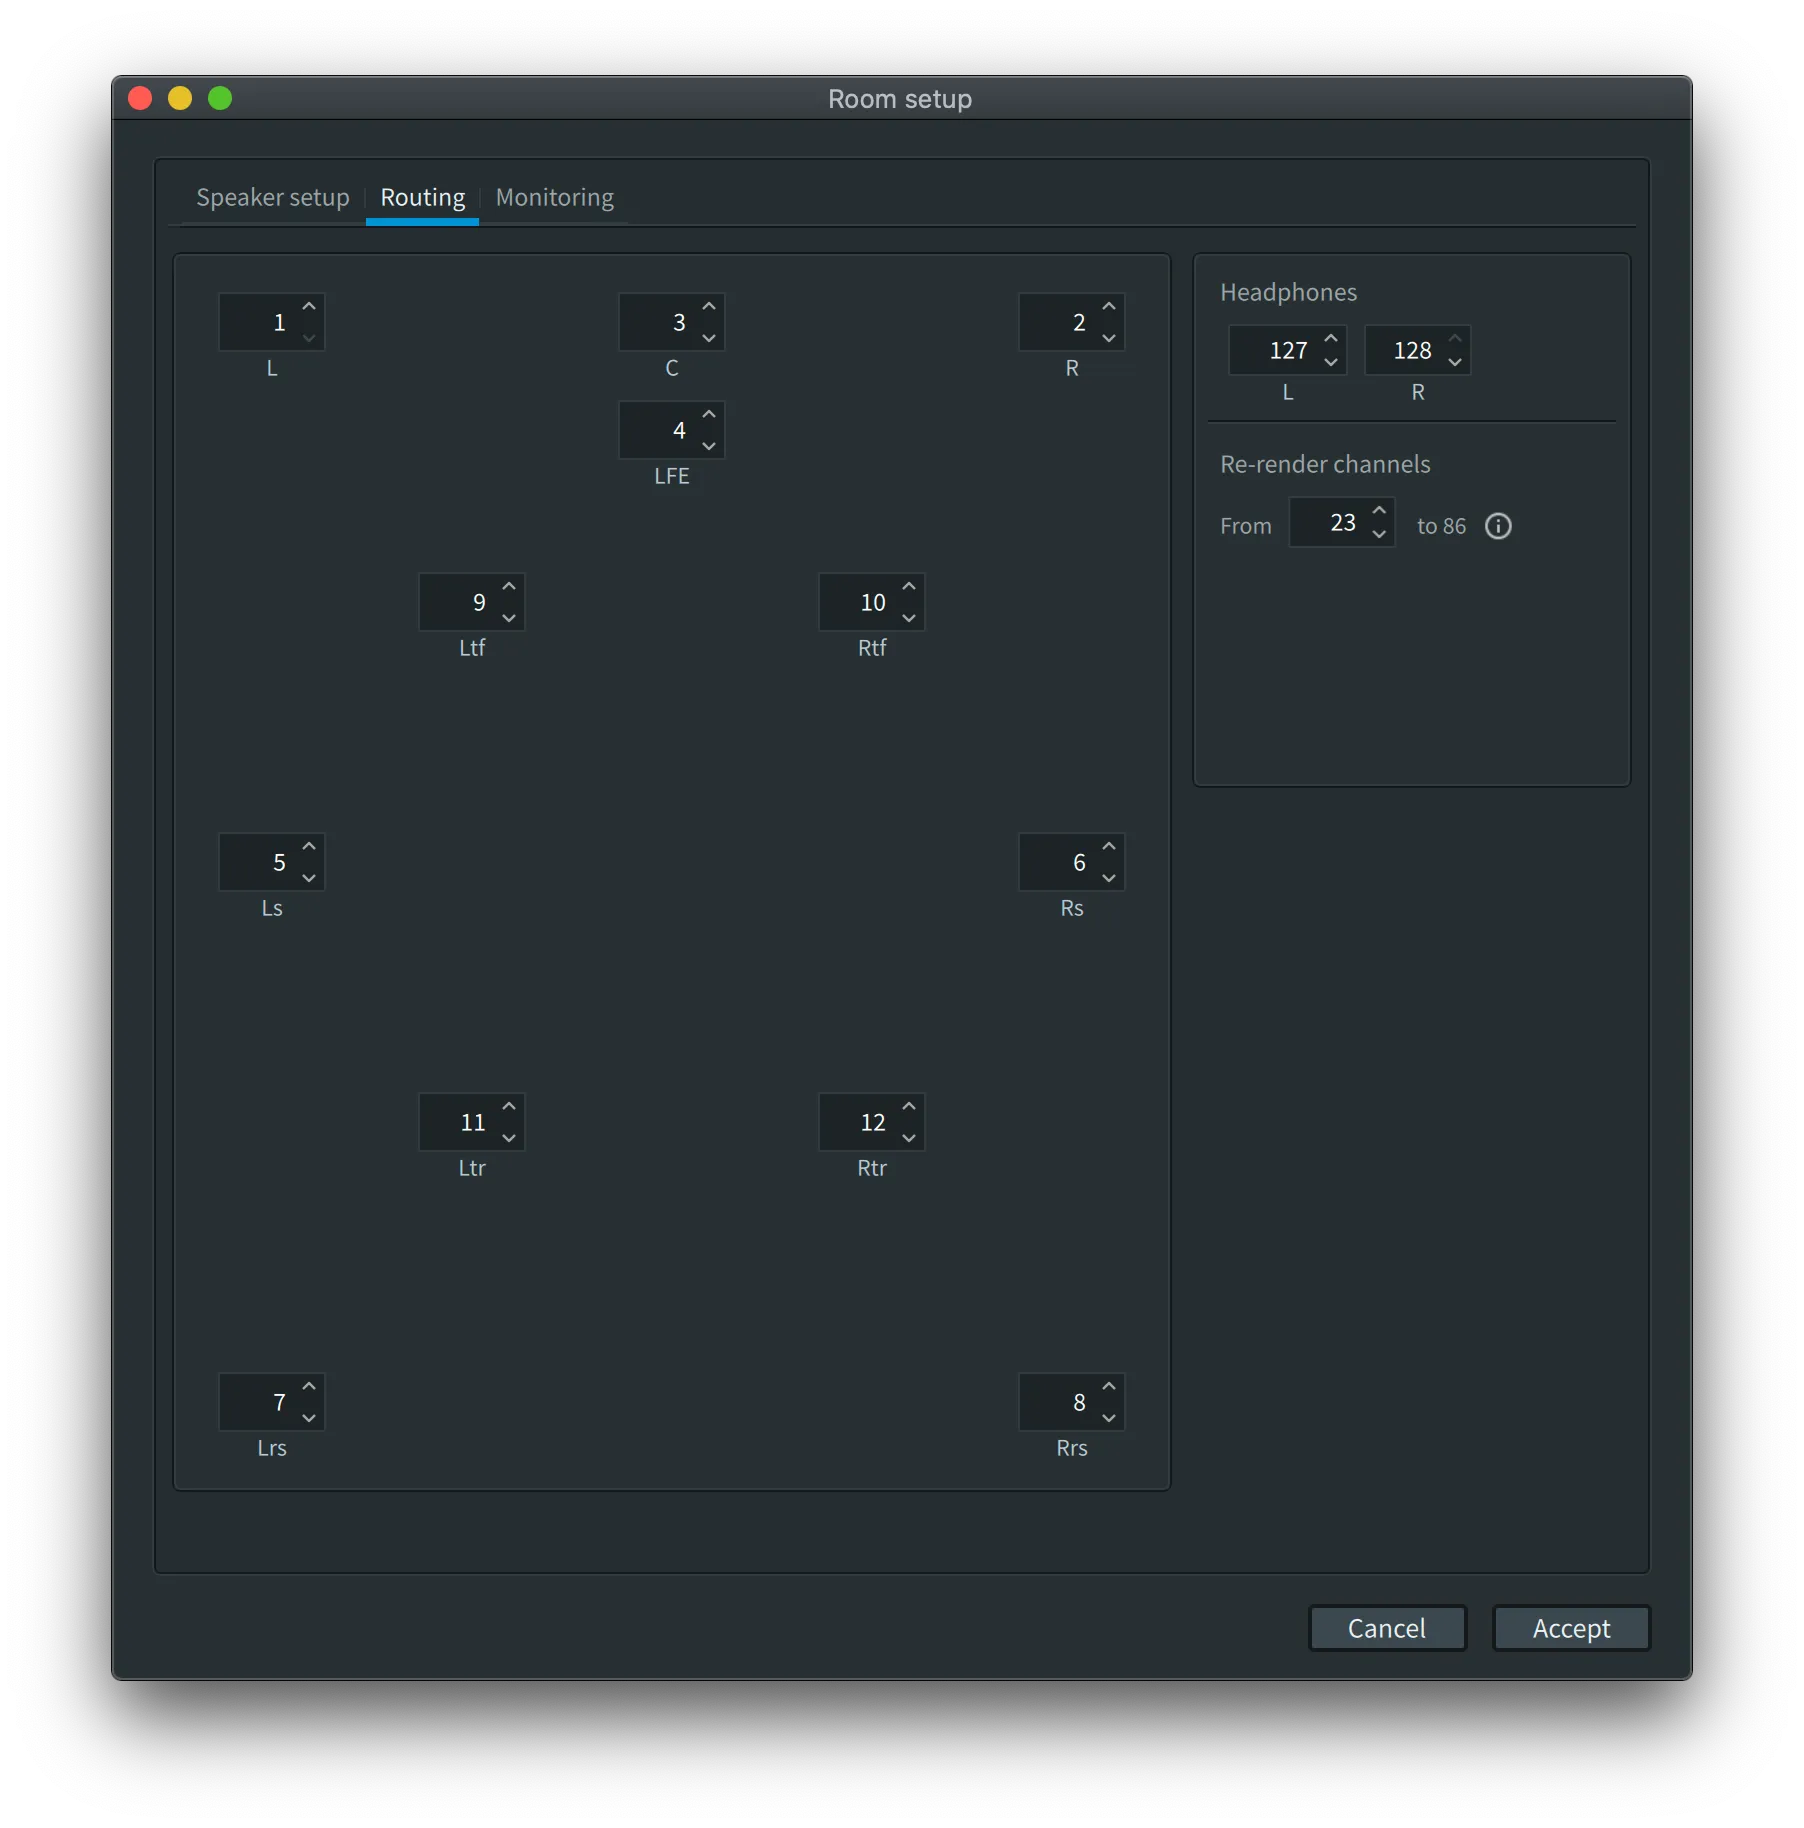
In the Renderer’s main window choose 7.1.2 as the Monitoring setting up in the left corner. I find this slightly odd since the speaker setup is in fact a 7.1.4 configuration. But hey. Just follow along.
Studio One Setup
Now it’s time to fire up Studio One and change some settings.
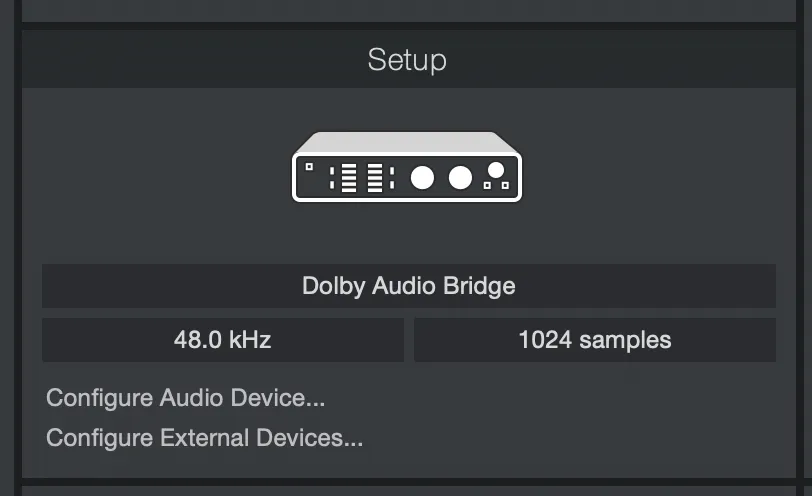
First, choose the Dolby Audio Bridge as the audio output device. Make sure the sample rate is set to 48kHz (or 96 kHz, if you prefer).
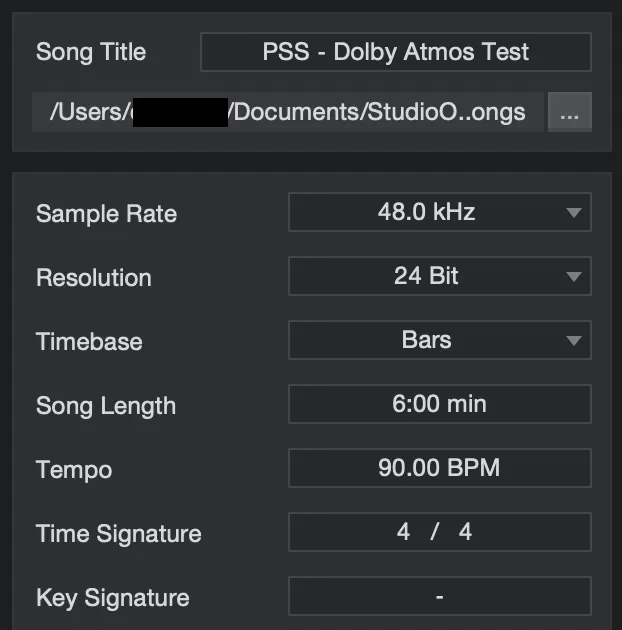
After that it’s time to create your Dolby Atmos project, or song. Make sure the sample rate matches what you chose in the audio settings. 24 bit Resolution should suffice. Choose a length of the song and a tempo as you normally do.
When the new song has loaded, open the Studio One Preferences and choose the Audio I/O Setup tab and switch to Outputs.
Create 7 outputs as shown below. 5 stereo output pairs and 2 mono outputs.
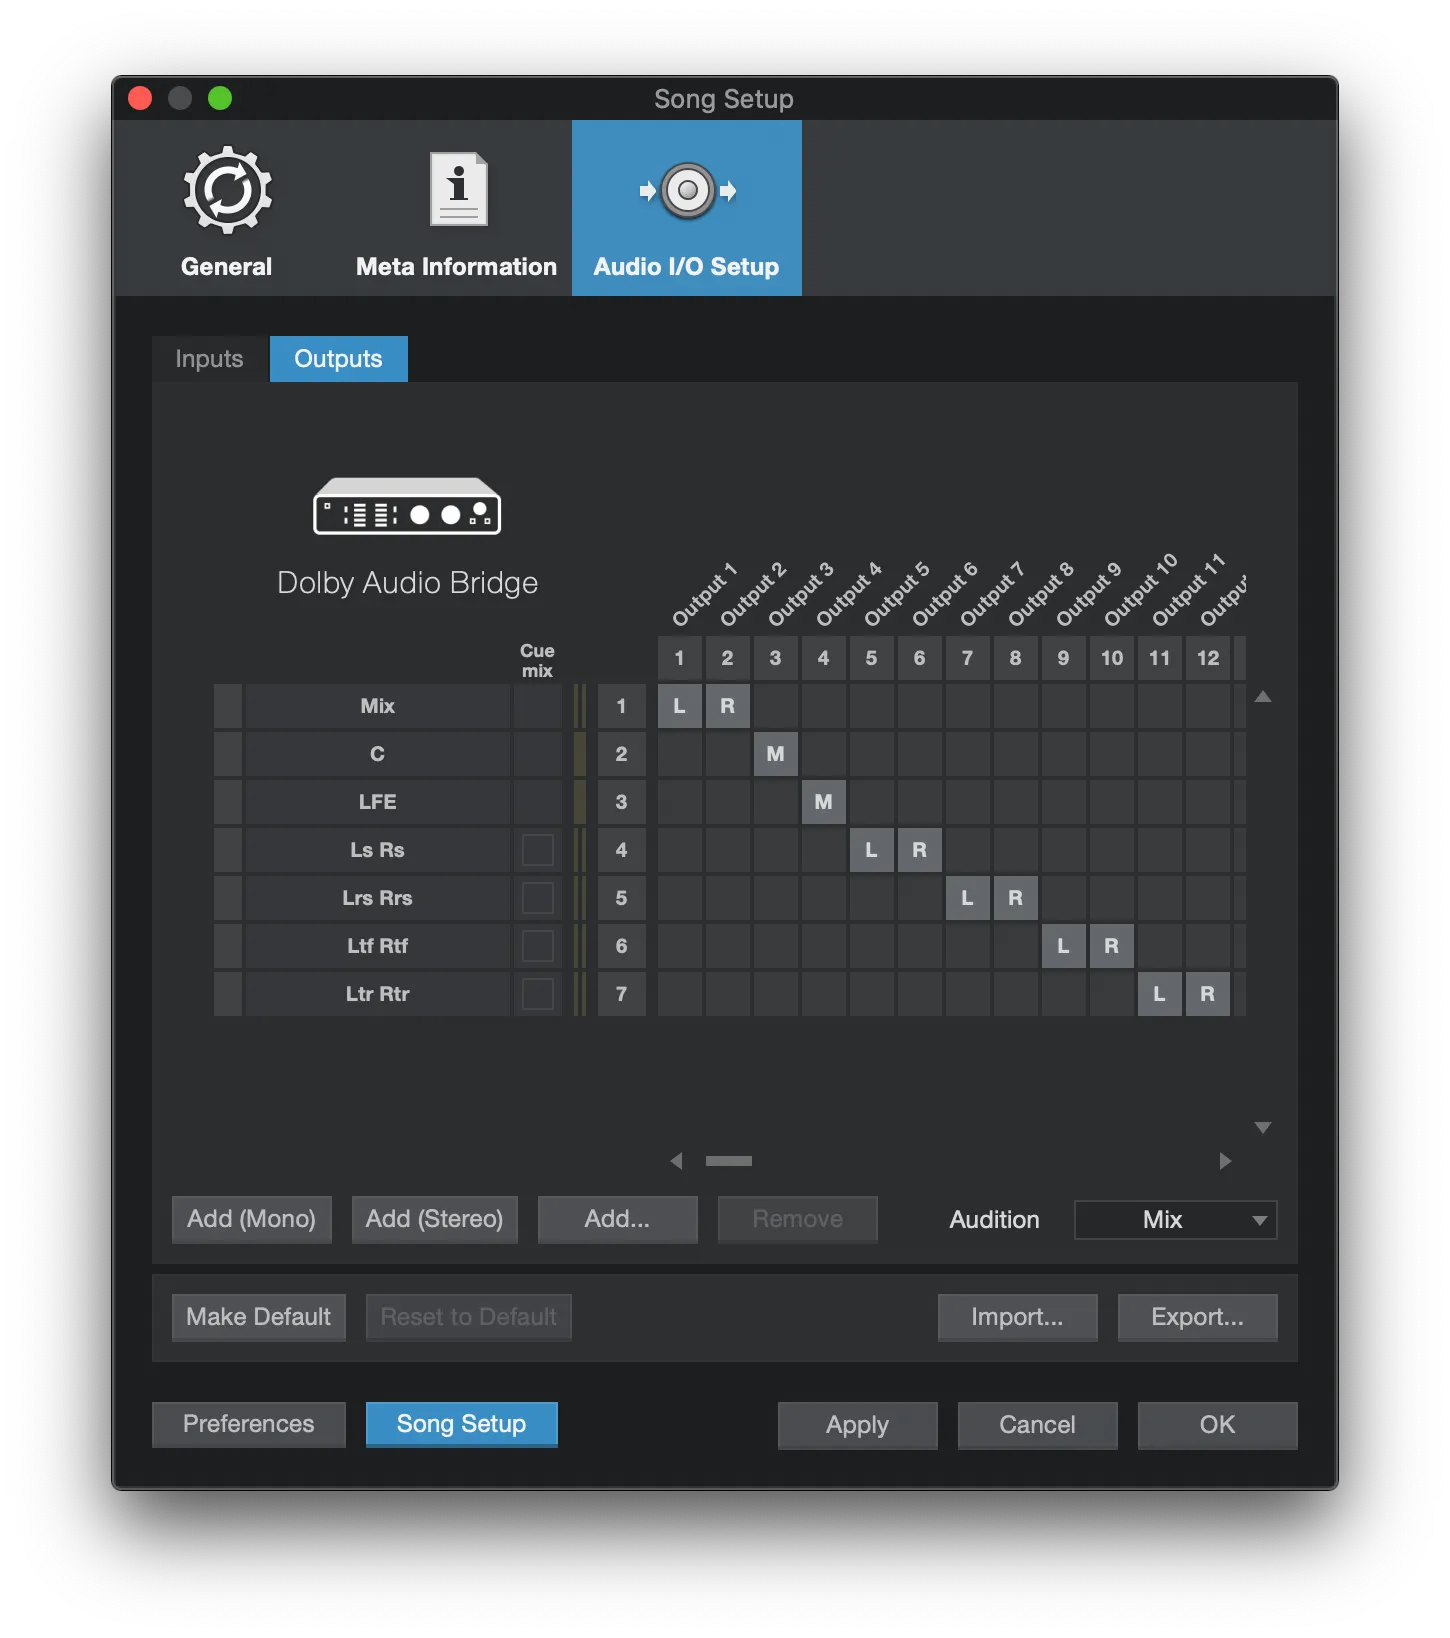
Mix is my front left and right speakers which I should rename to L R really. C is center, LFE is the Low Frequency Effects (read; rumble and deep booms). Ls Rs are the left and right side speakers. Lrs Rrs are the left and right rear speakers. Ltf Rtf are the left and right top front speakers and I think you now can guess what the Ltr Rtr output is. Yup, it’s the left and right top rear speakers. Click OK to save the settings.
Now it’s time to start making some music and adding some effects.
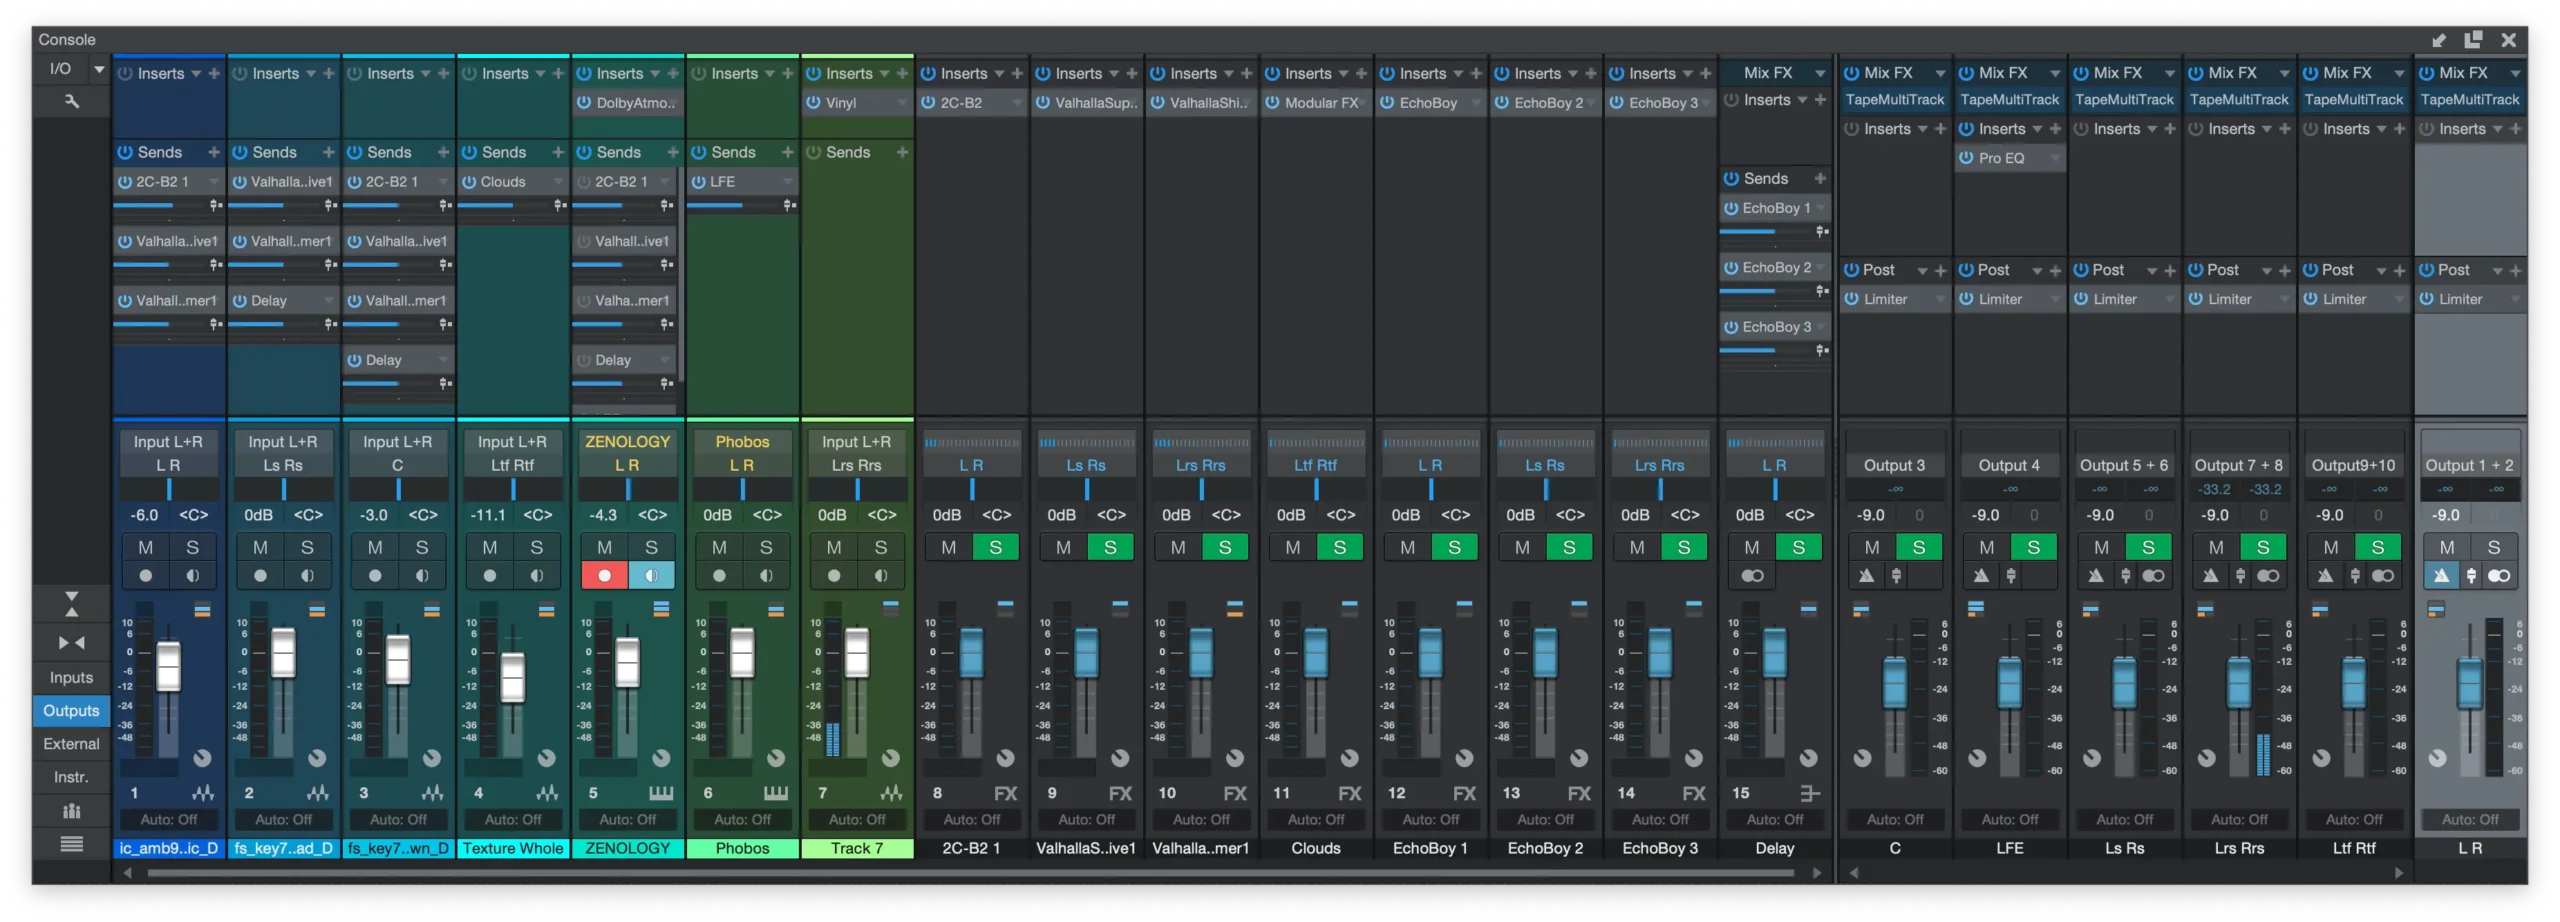
I’ve chosen four different reverbs;
- 2cAudio B2 is sent to my front left and right speakers. A very short delay so the reverb starts right away.
- The free Valhalla Supermassive routed to the left and right side speakers and with a delay set to 60ms.
- Valhalla Shimmer routed to the left and right rear speakers, but I’m thinking about swapping it for another instance of Supermassive with a delay set to 120ms.
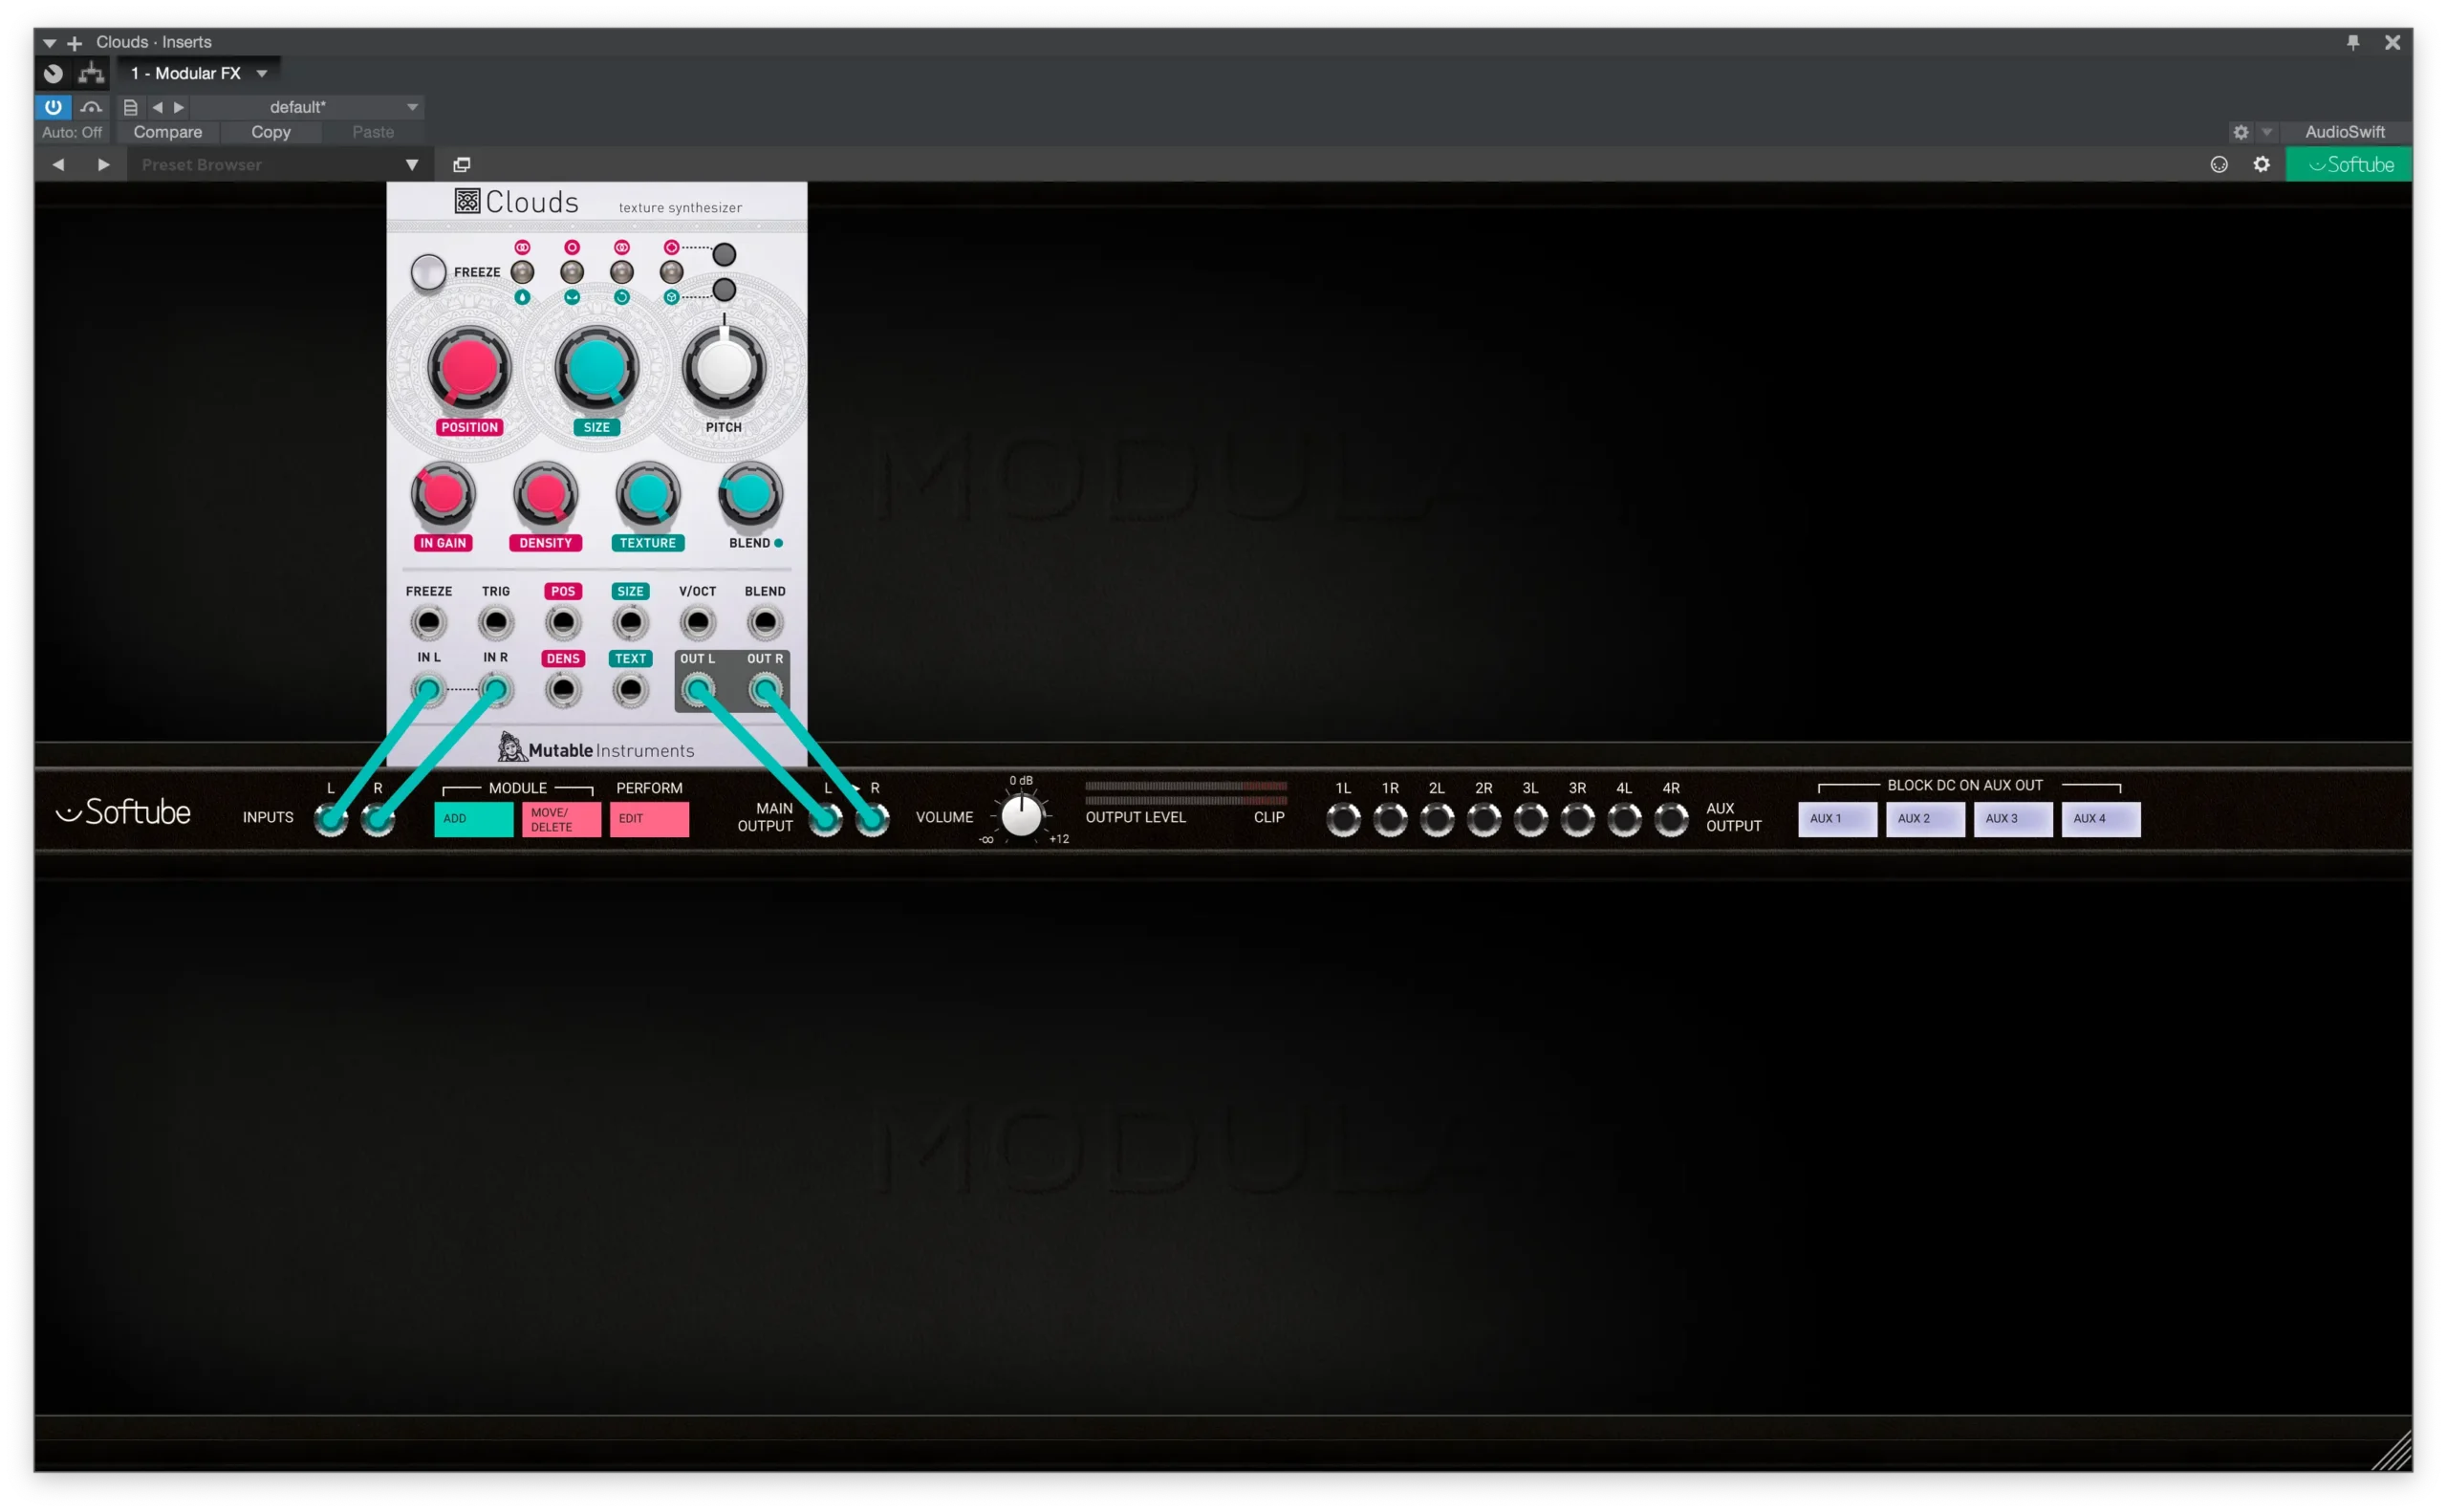
- For the top left and right speakers I’ve added the Softube Cloud emulation.
I’ve also added three SoundToys EchoBoy plugins with three slightly different settings. The first instance goes to the front left and right, the second to the left and right side and the third to the left and right rear speakers. The further back in the room the more wobbly the delay signal is.
Bear in mind that mixing in Dolby Atmos, or 7.1.2 as this is, is CPU heavy. The only way to render an audio file is to hit record in the Dolby Atmos Renderer application and then hit play in Studio One. So make sure that your song can be played back without any hick-ups due to CPU spikes.
There you go. Now it’s time for you to explore the surround and binaural world of music creation.
1 comment so far